Showing posts with label Breads. Show all posts

Sunday, April 20, 2008

A childhood friend revisited


When I was more wee than I am now, I loved Strawberry Shortcake. You know, the dolls. I had quite a few of them. I even preferred them over my Barbies. I adored how the dolls smelled like their names (strawberry for Ms. Shortcake, blueberry for Blueberry Muffin, etc., etc., etc.).

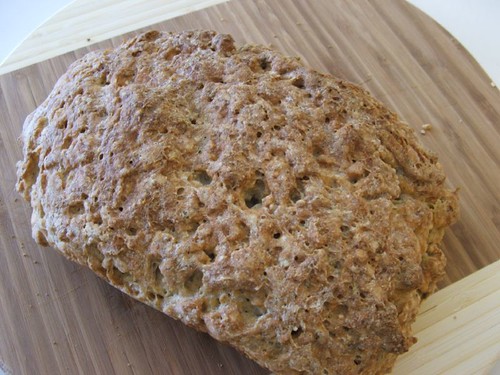
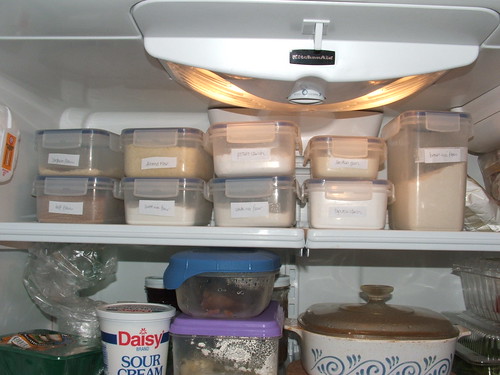
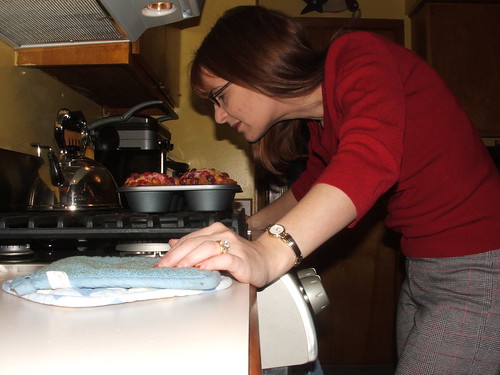
In my organic delivery this past Wednesday, I received two clamshells of strawberries. I ate over half of them out of hand but wanted to do something simple but special with the remaining fruit. After rifling through The Vault for about an hour, I found an old recipe for brown sugar biscuits. Strawberry shortcake coming right up!

As always, I cut the recipe in half so that if I had a big 'FAIL' I didn't waste a bunch of flour. Lord, I hate it when that happens. Happily, this conversion was a success and I made myself sick while gorging.

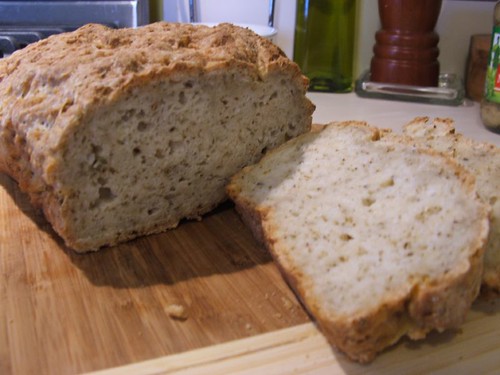
I gave one to The Man but he didn't like the texture. I simply looked at him and said, "this isn't angelfood cake, dumbass. It's a biscuit. REAL strawberry shortcake." His response? "Oh." I got the same reaction from another gluten-eating friend. They said it was very good, but they're used to strawberry shortcake with angelfood cake or those little dessert cup jobs you can buy in the grocery store. Naturally, that's what they prefer.
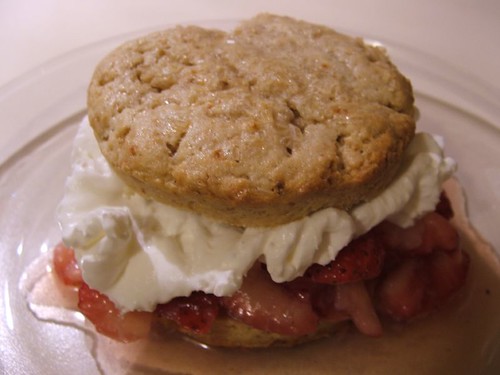
Me? I prefer this.

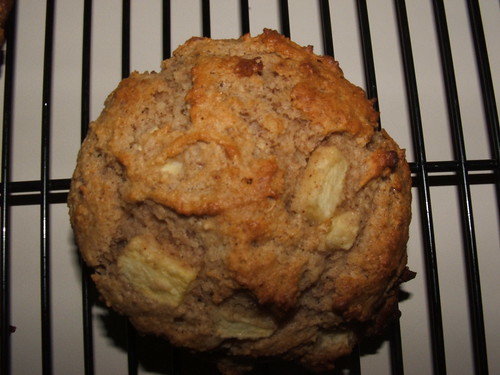
Brown Sugar Biscuits
Adapted from a Vault recipe


2/3 cup brown rice flour
1/3 cup tapioca flour
1/4 cup coconut flour
1/4 cup cornstarch
1 1/2 tsp xanthan gum
1/4 cup packed brown sugar
2 tsp baking powder
1/4 tsp kosher salt
4 tbsp butter, cut into pieces and chilled
1/2 cup + 1 tbsp heavy whipping cream + additional for brushing biscuits
1 tbsp turbinado sugar

Whisk together the flours, xanthan gum, brown sugar, baking powder, and salt. Add the butter and use your fingers to rub the butter in until it becomes a coarse meal. Gradually add the cream, tossing with your fingers until moist clumps form. Form the dough into a ball, wrap in waxed paper, and refrigerate for at least 30 minutes.

Preheat the oven to 350 degrees. Line a jelly roll pan with parchment paper.

Remove the dough from the fridge and gently pat it into a round disk about 3/4" thick. Using a 1-1/2" to 2" biscuit cutter, cut 4 rounds (gathering scraps and forming the disk again as needed). Place the biscuits on the prepared pan and brush the tops with cream. Sprinkle with turbinado sugar and bake for 20 minutes or until a toothpick inserted in the center comes out clean. Cool completely before serving.

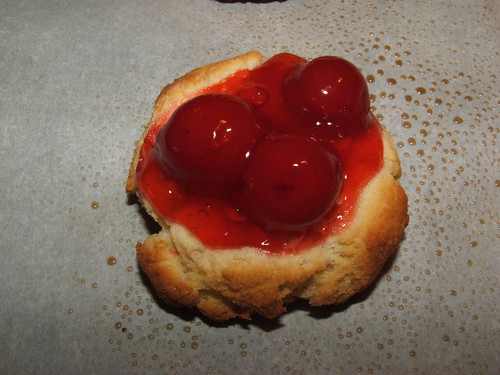
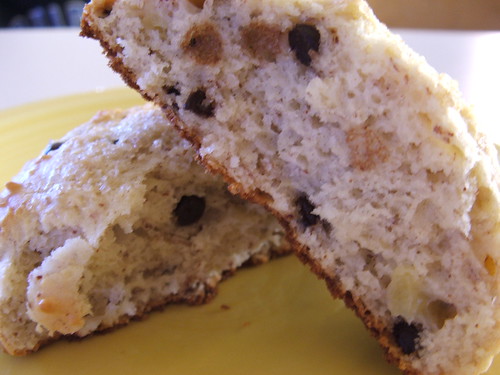
Like I said, I stuffed two of them with mashed strawberries and whipped cream last night, but I ate one with jam this afternoon and damn, was that good.

Sunday, April 13, 2008

Back to bran

Rice bran, that is.

I used to eat a lot of wheat bran, back in the old days. I loved me a bran muffin for breakfast and ate one nearly every day. And then we had the whole gluten issue.

I have had this recipe for years and years. I actually had forgotten about it because while it's a Vault recipe, it wasn't stored with the rest of them. I was flipping through my Joy of Cooking the other day and came across it, folded up and marking a page I can't recall at the moment.

I was totally excited because like I said, I had forgotten about it. I had picked up a box of rice bran the last time I was at the natural foods store, so I had everything on hand. I gave them a whirl yesterday morning and they turned out pretty well.

Just don't be greedy and eat more than one at a time. I learned that the hard way. Obviously I don't eat enough fiber.

Apple Cranberry Bran Muffins
Adapted from a Vault recipe


1/2 cup dried cranberries
1/2 cup brown rice flour
1/2 cup tapioca flour
1/4 cup buckwheat flour
1/4 cup arrowroot starch
1 1/2 tsp xanthan gum
2 1/2 tsp baking powder
1/4 tsp kosher salt
1/2 tsp cinnamon
3/4 cup rice bran
1 egg
1/3 cup skim milk
1/3 cup spiced apple butter (I used my own homemade stuff)
1/4 cup agave syrup
1/4 cup canola oil
3 tbsp molasses
1 cup finely diced peeled apple
1/4 cup chopped walnuts

Preheat the oven to 375 degrees. Line a standard muffin pan with muffin liners.

Place the cranberries in a small bowl and cover with hot water. Set aside.

In a large bowl, whisk together the flours, xanthan gum, baking powder, salt and cinnamon. Stir in the rice bran.

In another bowl, whisk together the egg, milk, apple butter, agave syrup, oil and molasses until blended.

Drain the cranberries.

Add the wet ingredients to the dry, but do not combine yet. Add the chopped apple, cranberries, and walnuts to the pile and then stir all together, just until combined. Scoop the batter into the prepared pan - fill those cups FULL.

Bake until a tester comes out clean, about 22 to 25 minutes. Allow to cool in the pan for 5 minutes, then move the muffins to a cooling rack.

Creating my own busywork


I keep a binder for all of my gluten-free recipes, as well as ones I want to try. It was a little disorganized, to say the least. I had been shoving the printed versions into the front binder pocket for months, so there were papers sticking out everywhere - and finally, yesterday morning, I dropped it. Imagine that.

I really needed something to organize all those pieces of paper. So I broke down and bought MasterCook 9.0 and started copying and pasting from Just Not Dinner, copying and pasting, copying and pasting. All day long. The really scary part of all this is that I now know what the nutritional content is for all of these recipes, and oh boy.

How did I stay at 108 pounds for 2 years?

Since I collapsed my dress orthotics with the extra 20 pounds I have put on since October or so, I guess I better pay attention to what I am putting in my mouth for a while and see how I do. I downloaded a nutrition program for my PDA and have been entering everything I shove in my mouth in there every day. Ladies and gentlemen, I have been eating far too much crap and not enough of the good stuff, like I used to.

I figure that a good part of not cooking healthy for myself is that whole cooking-for-other-people thing. On Sundays, I cook for a minimum of 7 hours. One other day of the week, it's about 4 hours. Both people I cook for are...particular...about the foods they eat. So while I love-love-love to cook, it's sometimes hard to have fun when it's the same stuff over and over again. But that's okay. I love that I am helping two people important in my life eat healthy and well.

I am trying to find the old me in the kitchen again. I need to stop taking the easy route of a pizza or sandwich for dinner instead of a wholesome meal. And I need to stay away from the damn Jelly Bellys and Doritos.

That being said, I am now closing the container of Jelly Bellys I was noshing on while typing the last few paragraphs. Someone take these away from me, please.

I made a truly delicious meal on Friday night, reminiscent of the dinners I used to make when I was in control of my snackiness. Saturday saw another Vault muffin recipe converted to gluten free (I will give the recipe in another post).

When I got home from work on Friday, I had no clue what to make for dinner. The Man wasn't home (a shocker, I know) so I knew I could putz and play and cook what I would like to eat, not what he would be willing to eat. Out came the savory Vault binder. I opened up the section for chicken and rapidly flipped through the page protectors in hopes that something simple would jump out at me.

I don't know if this qualifies as simple, but it has two bonuses - once I adapted it to what I wanted, I didn't have to go to the store to get additional ingredients (everything was in the pantry and fridge) and it was damn tasty.

Chicken with Sugar Snap Peas & Asparagus
Adapted from a recipe by Eating Well, found in The Vault


1 cup chicken broth
1 tbsp dijon mustard
1 healthy pinch of salt
Freshly ground pepper to taste
2 tsp + 2 tbsp white rice flour
3 boneless skinless chicken breasts
1 tbsp olive oil
1 cup fresh sugar snap peas
1 cup fresh asparagus spears cut into 2" pieces
3 tbsp minced fresh chives
2 tsp champagne vinegar

In a small bowl, whisk together the broth, mustard, salt, pepper and 2 tsp flour until smooth. Set aside.

Using a mallet or rolling pin, pound the chicken breasts until they are between 1/4" and 1/2" thick. Sprinkle both sides of each chicken piece with the remaining white rice flour.

Heat the olive oil in a large skillet (I actually used a large chef's pan for this, which worked well) over medium heat. Cook the chicken until golden, about 2 minutes per side. Transfer the cooked chicken breasts to a plate and cover with foil to keep them warm.

Using the same skillet; stir the broth mixture and add it to the skillet along with the peas and asparagus. Simmer for 2 minutes, stirring constantly. Reduce the heat to low, cover, and continue to cook until the peas and asparagus are just starting to get tender (5 minutes or so).

Return the chicken to the pan, squeezing it between the vegetables to get them into the sauce so that it can return to temperature. Continue to simmer for 3 to 5 minutes (until completely heated through).

Remove the chicken and place it on a serving plate. Add the chives and champagne vinegar to the skillet and stir. Serve the sauced vegetables with the chicken. I made sour cream, chive and cheddar mashed potatoes to go along with the meail.

Monday, March 31, 2008

Disappointing successes or successful disappointments


It all depends on how you look at it.

For Easter, I converted two Vault recipes to gluten free. The banana cupcakes turned out okay, but the frosting I used was *gag*.

The carrot cake was based on a recipe by Alton Brown. The cake was so moist that it was TOO MOIST, like I had loaded the batter up with pudding. But it sure looked pretty. If I try this again, I will cut back on the carrots - there were a lot of them and I think that's why the cake had the texture it did.

What DID work? Well, let me tell you!


Back before Bob's Red Mill began selling gluten-free oats, I attempted to adapt my absolute favorite blueberry "power" muffin recipe by using rice bran to replace most of the oats. Big mistake. These muffins are supposed to be heavy as they are meant to be used prior to or after a workout, but the rice bran turned these into bricks. Not good.

Now that I have oats, I attempted them again. The second try was a delicious success. Next time, to make them more "powerful," I think I am going to try splitting the amount of sweet rice flour with flax seed meal to see what happens.

Now remember, if you try these, that they are meant to be a bit heavy.

Blueberry Power Muffins
Adapted from a Cooking Light recipe


1/2 cup brown rice flour
1/4 cup tapioca flour
1/4 cup teff flour
1/4 cup sweet rice flour
1 1/2 tsp xanthan gum
1/2 cup rolled oats
1/2 cup organic cane sugar
1 1/2 tsp baking powder
1/2 tsp baking soda
1/8 tsp kosher salt
1 cup nonfat vanilla yogurt
1/4 cup skim milk
1 1/2 tbsp canola oil
1 tsp vanilla
2 tbsp egg substitute
3/4 cup fresh blueberries (I used wild blueberries, so these are chock-full - if you use wild berries, cut back to 1/2 cup)
1/4 cup slivered almonds, roughly chopped

Preheat the oven to 400 degrees. Line a muffin pan with muffin papers.

Combine the flours, xanthan gum, oats, sugar, baking powder, baking soda, and salt in a large bowl.; stir together with a whisk. Make a well in the center of the mixture.

In a separate bowl, whisk together the yogurt, milk, oil, vanilla and egg. Add the yogurt mixture to the flour mixture; stir together until all of the flour is just moistened. Fold in the blueberries and almonds.

Spoon 2 rounded tablespoons of batter into each muffin paper.

Bake for 18 minutes or until a tester inserted into a muffin comes out clean. Cool in the pan for 10 minutes, then remove and serve.

Monday, March 10, 2008

Two of my favorite things


Blueberries and cornbread. Yum. Put them together and you get a tasty treat. Keep in mind that these are not sweet at all. If you would like them sweeter, add another 1/4 cup sugar.

Blueberry Corn Muffins
From The Vault

1 cup skim milk (original calls for buttermilk, so if you'd like, use that)
2 eggs
1/4 cup canola oil
1 cup cornmeal
1/2 cup brown rice flour
1/4 cup tapioca flour
1/4 cup amaranth flour
1 tsp xanthan gum
1 tbsp flaxseed meal
1/2 cup packed brown sugar
1 1/2 tsp baking powder
1/2 tsp baking soda
1/4 tsp salt
2 half-pints fresh blueberries

Preheat the oven to 400 degrees. Line a 12-cup muffin pan with liners.

Whisk together the milk, eggs and canola oil. Set aside. Combine the cornmeal, brown sugar, baking powder, baking soda, salt, brown rice flour, tapioca flour, amaranth flour, xanthan gum, and flaxseed meal. Add the blueberries and toss to coat. Add the buttermilk mixture and stir just until combined and all ingredients are moist.

Spoon the batter into the prepared pan. Bake until a tester inserted in the center of the muffins comes out clean, about 25 minutes. Let stand for 15 minutes before serving.

Tuesday, January 01, 2008

Tradition


Every time I think about the word "tradition," I hear the cast of Fiddler on the Roof singing in the background.

My first New Year's Day in Illinois was spent with The Man and two loaves of pizza bread, with which we used to make, well, pizza bread. He'd watch football and I would either read or crochet.


We did the same for the next three years. We kind of got away from it for some unknown reason but I decided at 5:00 this morning that it was time to bring this tradition back. The Man is playing in a euchre tournament this afternoon, but I am following through on the pizza bread, reading and crocheting (no football, thank you very much) until he gets home, when he will have his pizza bread.

This is one of the recipes from The Vault that I have no idea where it came from. All I can tell you is that it was damn good back when and it's nearly as good in this gluten-free form.


Pizza Bread
Adapted from The Vault


1 1/2 cups warm milk
2 tbsp olive oil
3/4 cup sorghum flour
3/4 cup tapioca starch
1/2 cup potato starch
1/2 cup cornstarch
2 1/2 tsps xanthan gum
2 tbsp sugar
1 tsp dried basil
1 tsp dried oregano
1/2 tsp garlic powder
1/2 tsp onion powder
3/4 tsp kosher salt
1 1/2 tsp yeast

Combine the yesat, milk and sugar is the bottom of a mixer bowl. Allow to sit for 5 minutes so the yeast activates.

Add the flours, xanthan gum, and spices. Mix with a paddle attachment until well blended. Add the olive oil. Cover and place in a warm area to rise for 1 hour.

Heat the oven to 350 degrees. Pour the dough into a greased loaf pan and bake for 60 minutes. Cool completely on a wire rack. Slice into 1/2" thick slices and top with your favorite pizza toppings, bake for 10 minutes at 425 degrees for serving.

Friday, October 12, 2007

My favorite cornbread, now gluten free

When I made chili last fall and winter, I made Bob's Red Mill cornbread mix to go with it. I hadn't learned enough about the various flours to even attempt to make my favorite cornbread recipe, one I tore out of a Martha Stewart Living magazine years ago.

But that was then - this is now.

I started eating chili in my dreams a few days ago. Here in Illinois, temperatures this week have been below normal - averaging about 50 degrees for a high. Brrr.... Besides, it's fall. And Haunted Barn season. I always made a lot of chili and cornbread during this season.

And now I can get right back to that familiar ritual. Because I have converted my cornbread to gluten free.

Try it. It's a slightly sweet, crunchy cornbread that goes great with the smokiness of chili. If you don't like your cornbread with a bite of crunch, you can use fine-ground cornmeal.


Brown Sugar Cornbread

Adapted from a Martha Stewart recipe

1/2 cup unsalted butter, plus more for the pan
1 1/3 cup medium-grind cornmeal
1/3 cup brown rice flour
1/3 cup sorghum flour
1/3 cup cornstarch
1 tsp xanthan gum
1 1/4 tbsp baking powder
1/2 tsp kosher salt
1/3 cup brown sugar
1 cup milk
2 eggs, beaten

Preheat the oven to 350 degrees. Butter a 9x4 1/2" loaf pan and set aside.

In a large bowl, whisk together the cornmeal, brown rice flour, sorghum flour, cornstarch, xanthan gum, baking powder and salt.

In a saucepan, melt the butter. Add the brown sugar and whisk briskly until combined. Remove from the heat and then add the milk; stir. Add the beaten eggs, whisk quickly, and then pour over the dry ingredients. Stir until just combined. Pour the batter into the prepared pan and bake for 35 minutes, or until the top is golden brown and a toothpick inserted in the center comes out clean. Allow to cool for 1o to 15 minutes, remove from the pan, and slice.

Friday, August 31, 2007

Tropical (un)Wholesome Goodness

I am in a mood.

Imagine that.

I have been a good girl all week with the non-smoking thing. I have not had a drag. Not that I haven't thought about it. But I know that if I take one drag, it's all over.

And it's Labor Day weekend! Three days of busting butt at the barn (nice alliteration, huh?). We are one month from opening weekend and I am starting to get nervous.

Now, if the pictures I post below aren't there, I will fix it. Someone (-cough-TheMan-cough, cough-) neglected to pay the phone bill so I can't get at my Flickr account. Should be rectified shortly, and I will replace the pictures when I can get at them.

Let's see. What else is new, since my mind is on what's cooling on the counter right now. Oh yes. A new puppy shot for you...


And here's what's on my countertop, calling my name...


Banana Coconut Muffins
Adapted from a recipe on Epicurious

2/3 cup brown rice flour
1/3 cup tapioca starch
1/4 cup coconut flour
1 1/2 tsp xanthan gum
1/4 tsp kosher salt
1 tsp baking powder
2 ripe bananas, mashed (about 3/4 cup)
1/2 cup butter, melted (I seem to be on a roll for high-fat recipes lately)
2/3 cup sugar
1 large egg
1/2 tsp vanilla
1/2 cup sweetened flaked coconut

Preheat the oven to 375 degrees. Lightly grease a regular muffin tin or mini-muffin tin and set aside.

Sift together the flours, xanthan gum, salt, and baking powder. Set aside.

In a large bowl, combine the butter, egg, bananas, sugar, vanilla, and coconut. Fold in the flour mixture until the flour is just moistened.

Spoon the batter into the prepared muffin tin. Bake until lightly browned, about 17 minutes for mini-muffins and 25 minutes for regular-sized muffins.

Sunday, July 08, 2007

More bread


Yesterday afternoon, I started to make a double batch of the no-knead bread recipe (it makes a larger, taller loaf that way) and decided to veer off a bit (well, more than a bit). I only had one slice with some homemade blueberry jam at about 9 last night, so I plan to have one or two with breakfast so I can see if I really like it. The little taste I had indicated that I will.


Update 7/8/07 2:20 PM - I had two slices as toast for breakfast and 2 slices untoasted in a sandwich for lunch. Score! It has a good texture although denser than gluten bread. It tastes great with ham :-) I will see what it's like tomorrow after another day on the counter.


I have no idea what to call it, so this is it:


Pretty Good Sandwich Bread


1 1/2 cups sorghum flour


1/2 cup buckwheat flour


1/2 cup potato starch


3/4 cup tapioca starch


1/4 cup flaxseed meal


1/2 cup cornstarch


2 tsp salt


2 1/2 tbsp sugar


2 1/2 tsp xanthan gum


1 tbsp olive oil


1 1/2 tsp yeast


2 cups lukewarm water


Preheat the oven to 200 degrees. Spray a loaf pan with cooking spray and set aside.


Combine the sorghum flour, buckwheat flour, potato starch, tapioca starch, flaxseed meal, cornstarch, salt, sugar, xanthan gum, and yeast in the bowl of your mixer. Whirr a few times to blend. With the mixer on low, slowly add the olive oil and then the water. Once all added, increase the mixer's speed to high for 3 minutes. The dough will be fairly thick and sticky.


Pour the dough into the prepared loaf pan, cover with foil, and place in the oven; allow to rise for an hour and a half. Remove the foil and increase the heat to 375 degrees. Bake for 50 to 60 minutes. If the top starts to get too brown while baking, cover with foil.

Saturday, May 05, 2007

Ummmm....oops?


All right, so I forgot to take pictures until AFTER we ate.

So what if I show you a nearly empty plate.

Big deal if I show you a huge pile of crab leg shells.

Whoop-di-do if I rub it in that I just made and ate a totally awesome, satisfying dinner.

But you can still share by making these rocking biscuits. And if you are so inclined, you can have lemon-steamed crab legs and baby spinach salad too.

If you want.


Garlic & Cheese Biscuits
Based on Country Coconut Biscuits from Bob's Red Mill

1/2 cup white rice flour
1/4 cup brown rice flour
1/4 cup coconut flour (the biscuits taste nothing like coconut, so don't worry)
2 tbsp potato starch
3/4 tsp xanthan gum
1 tbsp baking powder (forgot this - sorry!)
1 tsp sugar
Scant 1/2 cup grated cheddar cheese
1/2 tsp garlic powder
1/2 cup milk
1/4 cup butter, softened

Preheat the oven to 450 degrees. Prepare a cookie sheet with a light coating of cooking spray.

Combine the dry ingredients in a medium-sized bowl. Add the butter and cut in with a fork until the mixture is crumb-y. Add half of the milk; stir gently with your fork. Add the cheese and the rest of the milk. Stir until just combined.

Cut 2 foot-long pieces of wax paper; place the dough betwen them and gently pat down evenly to 3/4" to 1" thick. Using a 2" biscuit cutter or a glass sprayed with cooking spray, cut circles. Pull away the scraps from the biscuits and set aside, use a spatula to pick up the biscuits and put on the cookie sheet. Ball up the scraps and pat down between the pieces of wax paper....again and again until you have 9 biscuits on your cookie sheet.

Bake for about 10 minutes, or until golden brown.

If you take a good look, you can see cheese bubbling out of the biscuit in the picture.

And if you're interested....Lemon-Steamed Crab Legs

We are somewhat pig-like when it comes to crab legs. Believe it or not, this fed only 2 people.

4 pounds king crab legs
6 cups water
2 lemons, sliced into rounds
1 tsp salt

Combine the water, lemons and salt in a huge stock pot. Bring to a boil, then add the crab legs. If frozen like ours were, they will probably take about 20 minutes to cook. Otherwise, 15 minutes max.

Sunday, March 18, 2007

GF Kolache

Growing up, when I figured out that my mother was cranking out kolache, I got really excited. I love these things! I assume the original glutenous recipe came down through her side of the family.

I was flipping through cookbooks early this morning, in the mood to bake but not sure what I wanted. I looked at doughnuts, cakes, cookies....and then I saw a recipe for danish. Hmm. I wonder what would happen if I tried to convert the family kolache recipe to gluten free?

After a little research as I haven't really tried to convert a recipe like with this much flour before, I started out by pulling a bunch of flour containers out of the fridge (the top shelf is devoted to GF flours now).

Flour dusting the countertop is a call for Baby, who loves flour. He would have licked the area clean if I hadn't come running to nicely chuck him to the floor.

While these don't taste quite like what I remember, nor are they as pretty, they are still tasty.

This recipe is considerably easier with a stand mixer as the dough gets pretty stiff.


Gluten Free Kolache
Adapted from the family recipe

1 1/2 cups lukewarm milk
2 tbsp shortening
2 packages yeast
1/2 cup sugar
2 eggs
1/2 tsp kosher salt
1/2 tsp vanilla
2 cups white rice flour
1/2 cup almond meal
1/2 cup brown rice flour
3/4 cup sweet rice flour
1/2 cup tapioca starch
4 1/2 tsp xanthan gum
1 can cherry pie filling (Wilderness brand is GF) or other favorite filling

Combine milk, shortening, yeast and sugar in the mixer bowl. Let stand for 5 minutes. Lightly beat 2 eggs with the salt and vanilla; add to the mixer bowl. Using the paddle attachment, give it a whirr for a minute to mix together. In a separate bowl, mix the flours and xanthan gum together. Slowly add the flour mixture to the mixing bowl until the dough starts to get stiff (stop adding flour at this point). Switch to the dough hook attachment and start adding flour again. Once you have all the flour mixed in, cover the dough with plastic wrap and set aside to rise for an hour.

After the dough rises, roll into 1 1/2 inch balls and place on cookie sheets lined with parchment paper and sprayed with cooking spray. Allow to rise again for another 30 minutes.

After the second rising, use a spoon to push down the centers, leaving a 1/2" rim around the outside. Fill with a spoonful of pie filling.

Preheat the oven to 400 degrees. While the oven is preheating the dough rises a final time.

Bake for 18-20 minutes.

Sunday, March 04, 2007

Because it's never too early for chocolate


Good morning!

I had a batch of these gluten-free breakfast goodies fired up at 5:00 this morning!

Banana Chocolate Chip Scones
based on a recipe on the Pamela's website

3 cups Pamela's Baking & Pancake Mix
1/3 cup sugar
1 tsp baking powder
4 tbsp butter
1 egg
2/3 cup milk
4 extremely ripe bananas
1/2 of a 10-oz package of Enjoy Life chocolate chips
Turbinado sugar

Preheat the oven to 375 degrees.

Combine the baking mix, 1/3 cup sugar, and baking powder in a bowl. Cut in the butter until the mixture resembles crumbs. Beat the egg and milk together, then mash the bananas and add them to the egg and milk. Pour the wet mixture into the dry. Mix together and then add the chocolate chips.

Drop by 1/2 cupfuls on a greased cookie sheet and sprinkle the tops with turbinado sugar. Bake for 16 minutes, until lightly golden and a toothpick inserted in the middle of a scone comes out clean.

Makes 10 scones.

Monday, January 15, 2007

Mondays don't always suck

Granted, it's been my experience that Mondays do indeed suck. At least as far as hauling my ass out of bed and going to work for 9 hours is concerned. Mondays don't suck when I am on vacation or when some pretty good grub comes out of the kitchen.

So today, this Monday, it doesn't suck. I made apple cinnamon scones for my week's breakfasts and when I got home tonight, I cranked out some chicken quesadillas - purchased flour tortillas for The Man and fresh homemade corn ones for me.

Play it safe - make your own tortillas. Less worry that way. Besides, it's damn easy. Right now, I make them using a rolling pin, but a wonderful co-worker is giving me her cast iron tortilla press this weekend! She said it's never been used.

At 7:00 this morning, I was cranking out the scones. Not bad.


Apple Cinnamon Scones
Adapted from the Pamela's website

2 1/3 cups Pamela's Baking & Pancake Mix
1/2 cup sugar
1 tsp baking powder
1 tsp cinnamon
1 cup apple, chopped
4 tbsps butter, softened
1 egg, beaten
2/3 cup milk

Combine the dry ingredients in a bowl. Add the butter; cut in using a fork or a pastry blender. Peel, core and chop 2 medium-sized apples. Add the apples, egg and milk; stir until just combined.

I used an ice cream scoop to portion these, so I came up with 7 big even scones. Bake at 375 for 15 to 18 minutes (or until browned).

Chicken Quesadillas

3 boneless skinless chicken breasts
2 tbsp olive oil
1 1/2 tsp mexican seasoning
Shredded cheese of your choice
Corn tortillas
Salsa
Sour cream

Pour the olive oil into a skillet and then start preheating it. When it's hot, add the chicken breasts and cook until done. While the chicken is cooking, make your tortillas according to the directions on your package of masa harina. Note: I cook them in a dry skillet then cook them again in the oven when the quesadilla is put together.

Once the chicken is cooked through, remove it from the pan and set aside to cool for a bit. Then shred it with 2 forks. Place the shredded chicken in a bowl and then add the Mexican seasoning; toss to coat.

Shred your cheese. Preheat the oven to 425 degrees. Place 1 tortilla on a baking sheet; spread a helping of chicken over the tortilla, then top with cheese. Place another tortilla on top. Bake for 10 minutes or until the cheese is melted and the tortillas are browned.

Top with salsa and sour cream or whatever you like. This probably sounds gross, but try it - you might like it - I mix together about 1/4 cup of salsa and about a tablespoon of sour cream and then dip into it.

Saturday, January 06, 2007

GF Cinnamon Rolls

The TV got me again last night. I don't know what the heck I was "watching" as I was dozing off (removing the glasses will cause that when you're as blind as I am), but it put the thought of cinnamon rolls in my head. Mom makes awesome ones, but I sure can't eat those anymore. So as I headed toward sleep, I thought about how I could make them. Here's what I came up with.

GF Cinnamon Rolls

For the dough:

3/4 cup sorghum flour
1/2 cup potato starch
1/2 cup tapioca flour
1/4 cup sweet rice flour
1 1/4 tsp xanthan gum
1 1/4 tsp baking powder
3/4 tsp salt
1/4 cup sugar
1/4 tsp yeast
2 tbsp canola oil
1 cup water

(Yes, another bastardization of the no-knead recipe)

Combine all ingredients. Cover the bowl and let rise in a warm place for about 3 hours. Then add about a cup of white rice flour to thicken it up so it resembles a gluten dough more closely. Put in the fridge for an hour.

Very carefully, roll the dough out into a rectangle about 1/4 inch thick between 2 pieces of wax paper. Time for the filling!

For the filling:

Softened butter
Cinnamon (to your taste)
Sugar (to your taste)
Raisins, dried currants, or whatever floats your boat

Slather a layer of butter on the rolled-out dough, leaving about 1/2 inch free around the perimeter of the dough. Sprinkle with sugar, then cinnamon, then with the dried fruit. Pat the fruit down so it sticks.

Very, VERY carefully, begin to roll the dough, starting at a long side. I used an offset spatula to gently loosen the dough from the wax paper about 2 inches in all the way down, rolled to that point, then loosened again, then rolled....Until I had this.

Slice the roll into 1/2 inch slices.

Grease a baking dish. Tuck the slices in the dish like this:


Cover and allow to rise again for another 30 minutes.

Bake at 375 degrees until browned (about ____) minutes. Remove from the oven and allow to cool a bit before icing the rolls.

For the icing:

2 cups powdered sugar
1 tsp vanilla
4 tbsp water or milk

Whisk together. How simple is that?

Once the rolls have cooled down and you have iced them, dig in!


For a first effort, they aren't bad. The dough isn't sweet enough, so I will have to add more sugar next time. Otherwise, not bad.

Friday, December 29, 2006

Taste test - GF bread V2

I prefer the taste and texture of the latest version over the 1st one. Now if I can just keep it from sticking to the pot!

GF no-knead bread - revisited


Recently a little birdie put a bug in my ear about the no-knead bread recipe. So I took some of the bird's ideas, changed a couple of things on my end, and tried a loaf this way.

Here's what I did this time.

GF No-Knead Bread - Version 2

1 cup sorghum flour
1/4 cup potato starch
1/4 cup teff flour
1/2 cup tapoica starch
1/4 tsp yeast
4 tsp sugar
1 tsp sea salt
1 1/4 tsp xanthan gum
1 tsp baking powder
1 cup water
2 tbsp olive oil.

Mix together the flours, yeast, sugar, salt, baking powder and xanthan gum. Add the water and oil; beat until well combined (I actually let my stand mixer run on low speed for about 3 minutes, scraping down the sides of the bowl once).

Pour into an ungreased bowl; cover and let rise for 2 hours (I used my bread proofing cycle for the 1st 30 minutes and then shut it off, leaving the bowl in the oven for the remaining time).

To bake the bread, heat the oven to 500 degrees. Once it comes to temperature, put your pot in it and let it heat for a half hour. Take the pot out, dump the dough in, cover, and bake for 30 minutes.

Note the fact that the bread in the picture is still in the pot. That's because IT STUCK. Damn it. I know better than to use a new pot! So until I get back from giving a flute lesson, that is where it will stay. So no taste test quite yet.

Friday, December 22, 2006

No-knead GF bread


With all the buzz happening on the internet about that no-knead bread recipe, I hunted for a GF version. And found it and the Delphi forums back in November. However, I had to get my hands on sorghum flour, which my local store doesn't carry.

Last weekend, a co-worker was kind enough to go to Whole Foods for me and get some, among other things like Dagoba Chocolate and Lara Bars.

Yesterday afternoon, I put together the dough and let it sit until about 6:30 this morning. I don't have a cast iron dutch oven (yet!) so after judging the size of the risen dough, I put it into a small casserole dish.

No-Knead Bread from the Delphi Forums
From a member named Susan

2 cups Bread Flour Mix (I used:1/2 cup Sorghum, 1/2 cup Cornstarch, 1/2 cup Potato starch, 1/2 cup Tapioca flour)
1 1⁄4 tsp. xanthan gum
3⁄4 - 1 tsp. salt
4 tsp. sugar
1/4 teas yeast
2 tsp. olive oil
1 cup water

Mix all dry ingredients in large bowl of electric mixer. Quickly add olive oil and water to the bowl; beat at high speed for 3 minutes. Spoon dough into a bowl; cover with a light cloth and let rise overnight. In the morning stir the dough to get rid of huge bubbles, and preheat the oven to 450°F with a cast iron dutch oven (with lid) in the oven. After 30 minutes, take out the cast iron pan, add the dough and smooth out the top with a wet spatula. Put the lid on the pan, and put the entire thing in the oven. After 20 minutes, remove the lid and then bake 20 minutes more.

When I took the lid off, I put a pan of water into the oven. I must not have stirred it enough because I got a big-ass bubble. But it looks like regular bread, smells wonderful, and tastes like.....BREAD! Next time I do this, and I definitely will, namely for GF rolls for Christmas Eve, I will leave it in the oven a little longer. But oh my god, it's good.